
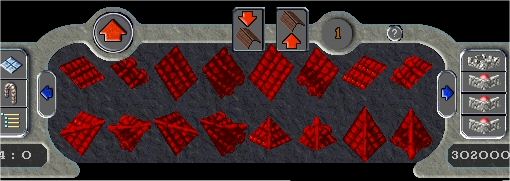
Styles of roof tiles available. Not all tile sets have the same pieces in them.
| Roofing 101; by Blackheath |
With the realease of the Samurai Empire expansion a large number of new tiles were added to the custom house building tool. Most of those tiles are used for builing a roof, which previously wasn't possible.
Styles of roof tiles available. Not all tile sets have the same
pieces in them.
After selecting a roof style, you will see a page with the pieces
that build your roof. This looks somewhat confusing at first, and is
even worse when you consider that many roof styles have a second page of
pieces as well! Worry not, this guide is meant to demystify the art of
building a roof. This guide is not meant to show all the possibilities
for roofing, but hopefully it will help introduce you to the tools and
basic concepts of building a roof.
A closer look at the tools:
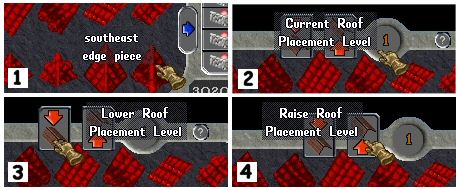
1: If you have tooltips turned on in your options (the pop-up help menu, second down on the left) , a description for each piece will show when you mouse over it. This is very handy when building a roof!
2: The circle shows the current level of placement, in this we are on level 1. There are 6 levels altogether.
3: The far left button is used to lower the current placement level
4: The button in the middle raises the placement level.
What�s all this level stuff?
Most of us are familiar with the decorator�s tool, using it to raise or lower items. You know you can lock a lantern down next to a wall and raise it to look as if it is hanging from the wall, even though you know it really occupies a floor tile. The roofing tool uses the same concept, but you choose the level of placement before you place the tile.
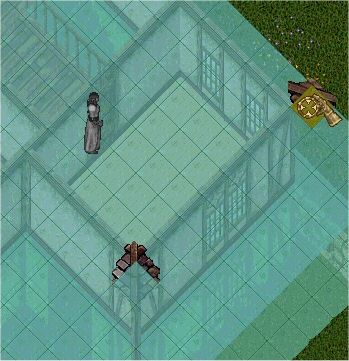
A full roof will occupy the entire top level of your house. Each square above your building will hold one roofing tile, raised to an appropriate level to give the desired look.
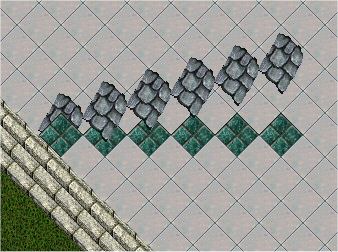
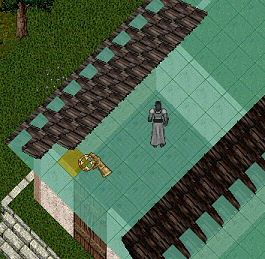
This image shows the south piece tile from the stone roof set placed
in increasing levels left to right. Each piece has been placed on the
green floor tile underneath it.
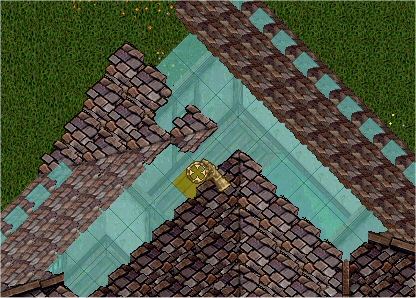
A note before building a roof:
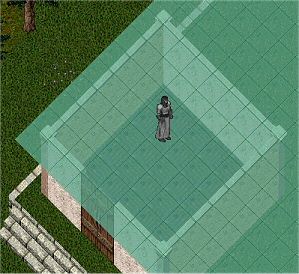
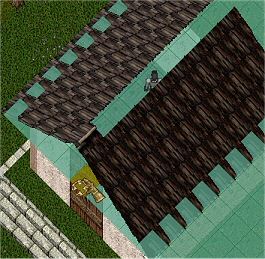
If you build your walls out to the edge of your property, and then
put a roof on top, you will end up with this effect:
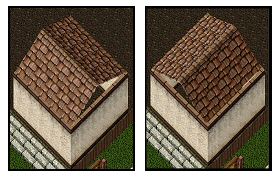
A peaked roof does not look very good this way; the gap is unsightly and the edge of the walls show around the roof. It is best to leave at least one tile free around your walls to allow the roof to overhang the edge of the walls, giving a much nicer finished look.
Another point to consider is the number of wall tiles in your building. Ideally, a roof will have an even number of side pieces on each side as well as the intersection, or peak part of the roof. This means that a roof will look more balanced if your wall has an uneven number of tiles. If you are building a flat roof this does not apply.
A simple roof:
Our first house is a simple 7x7.
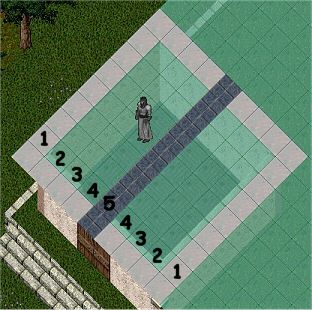
I have laid down tiles to help illustrate the placing of our roof.
The white tiles are actually outside the walls themselves, and this is
where the outermost tiles of the roof will be placed. The blue tiles
show where the peak of the roof will be, and the rows are numbered to
indicate what level of placement each row will have.
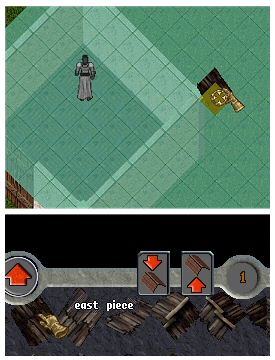
So, starting with an East piece at level 1, we begin to build our roof.
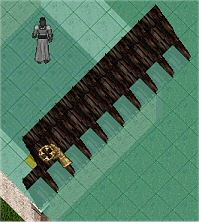
Building the level 2 row.
Third level on the West side.
And finally, the EW intersection "peak" being placed on the 5th level
to finish the roof.
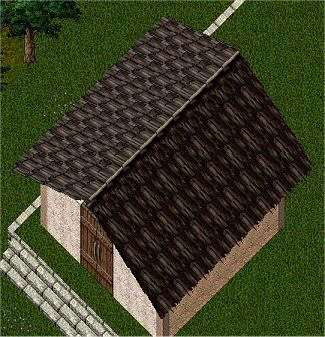
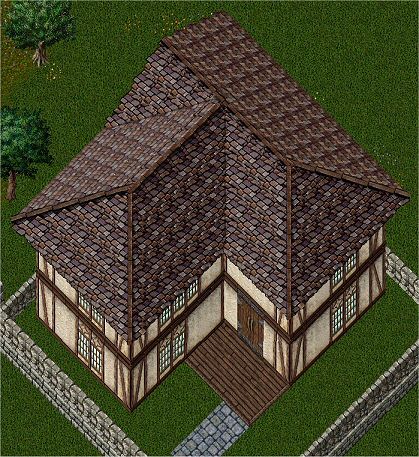
Here is our simple roof finished.
An L-Shaped Roof
Our second roof will be a bit more complex, showing the use of intersection and edge pieces.
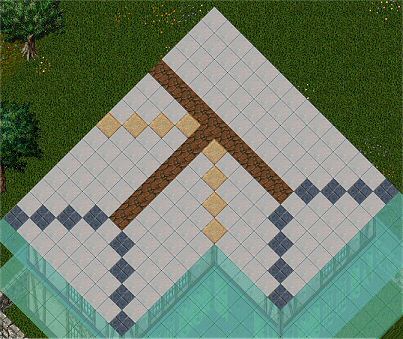
This layout shows the structure of our future roof. The blue tiles
will be SW, SE and NE Edge tiles; the sandstone tiles will be SW and SE
intersection tiles, and the brown tiles show the NS and EW intersection "peak" tiles.
Starting at level 1, placing the NE edge piece just outside the house
walls.

Working on the North piece 2nd level
Placing the level 4 SW intersection piece.
The finished roof.
It's a lot of fun to play around with different styles and shapes in roofing. You can get a good idea of what each tile set is capable of by walking around a city and looking at the rooves of buildings there. The only limit is your imagination; multi-level houses with several roofe areas, awnings, turrets etc. are all possible.
Happy roofing!