Kingdom Reborn New Player Guide
Skill Training & New Player Quests:
Trade/Crafter
Written by MissEcho
Training and Quests for the Trade/Crafter Classes
(Blacksmith/Miner/Tinker)
The Blacksmith template has three skills with training quests
attached. As for the previous two classes, you need to purchase the
additional training skill (10 points) prior to accepting the quests.
Most trade/crafter class characters normally have magery attached to the
template as a means to getting around, gating pack animals to and from
locations, use of the invisibility spell for when needing to hide from
unexpected monsters or players and other spells useful for the basic
defense of the class. Often the template will also include hiding and/or
stealth.
Trader class characters are often called 'mules' given they work for a
living to supply the other classes with items, armor, weapons, repairs
etc. Other complimentary skills include tailoring, carpentry/masonry,
bowcrafting and fletching, alchemy/glassblowing and lumber-jacking.
Blacksmithing and Tailoring are the two main trades used by the majority
of crafters and both trades have a system known as 'bulk order deeds' in
which are deeds obtainable from the smith and tailor npc's . These are
contracts from the npc's to supply a certain item at a certain quality and
quantity. For completing and handing in these deeds a smith or tailor may
obtain gold, fame and rewards for the service. More information on
training a crafter character is available in the skills menus to the
left.
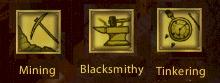
Skills with New Player 'Skill
Training' & Quests
Available
| Mining |
Blacksmith |
Tinker |
|
Mining
|
Blacksmithing
|
Tinkering
|
To complete the training in these three trades, it is worth
picking up the quest for focus before heading out so you may obtain the reward for
that quest as well. You do not need to purchase skill as it will reach 50
unaided by the time you have completed the three quests. Firstly find the
quest givers and purchase any additional training skill then return to
them and pick up the quests, alternatively head down to the miner in the
south and purchase both the training and the quest from him and complete
before doing the other two. The ingots you get from mining maybe
used in the other two quests. If you have some extra gold made by
doing a few escorts it could be worth going to the stable, near the south
east gate and buying a pack horse or llama off the npc there to take
mining with you. Saying 'all follow me' will get the animal to follow you
and 'all stay' will make it stay. Buying some fruit from the provisioner
to feed your pet will keep it loyal and obedient. To feed, drag the food
over the animal by left clicking and dragging and release on the animals
head. It could also be worthwhile getting some magery skill
and a spellbook with a few spells, suggest fireball, lightning and heal,
in case you get attacked by a mongbat on your way to mine. (see
spell-caster classes to set this up) Even if you are [young] your pack
animal may run off to protect you!
Skill Tips
Mining: Before heading to the miner purchase some shovels or
pick axes off the tinker so that you may complete the quests. To
raise your skill, mine the rock walls in the area around the miner. To
mine, click on your shovel and target the rock walls, ore will fall in your
pack if you are successful.
You may also set a macro to mine resources for you. To set one for
mining, go to the Menu Bar, select Main Menu, Macros/Actions, Create, left
click in the box on the left and pick an icon (scroll down to pickaxe) and
click on it to place in the first box, in the Action box scroll down until
you see Target by Resource and drag this across to the second box, in the
pop up box that opens, add in your shovel or pick. You may then
repeat this process of dragging the Target by Resources icon to the next
box and putting a
shovel in for as many shovels or picks as you purchased (suggest no more
than 5 or 6) once you have them
in click ok and name your macro. If you only loaded one shovel into the
macro click on 'enable repeating' and select 5-6 times. If you loaded in a
few shovels you will probably not need to enable repeating as you will not
be able to 'hold' the ore anyway due to strength. Click ok to complete the
macro and from your macro box drag the icon to a hotbar.
If you stand near the wall and click on the icon in your hotbar
it will automatically mine the spot. If you wish to put this on a hotkey,
to initiate the macro, then right click the icon in your hotbar and select
'assign hotkey' or assign it a hotkey in your macro box, as discussed in
the warrior class template for bandages.
You then need to smelt your ore on the forge, to smelt double click the
ore in your pack and target the forge, or better still load the ore into
your hotbar, right click and select cursor, click once and target the
forge or right click and select current and have the forge in your current
target bar so that it smelts automatically. The ingots will appear in your
pack, keep these for the blacksmith quest. If you are getting low on
tools, the other quest giver in that location will give you tools as a
reward if you give him 5 ore. If you get heavy you may need to put the ore
on the ground and shuffle it along unless you have a pack animal to load
it into. To load to a pack animal drop the ore on it's back, to get it
back out hold shift and right click on the animal to open it's backpack
and drag the ore out.. As a spot is mined out it is just a matter of
moving to a different location on the wall. Once you have gained 50 points
in skill you may collect your reward and head back to town. The reward
adds 10 points to your mining skill when equipped, so it is a very handy
reward to keep irrespective of if the uses run out.
Blacksmithing: Return to the smith and acquire the training and
quest if not already done so. Purchase some smith tools (suggest
tongs) off the smith there. If you kept your ingots from mining you will
have a head start, if not purchase some from the npcs at the smith
shop. When training any trade, try to pick the item to make that
requires the least amount of resources for the skill level you are at.
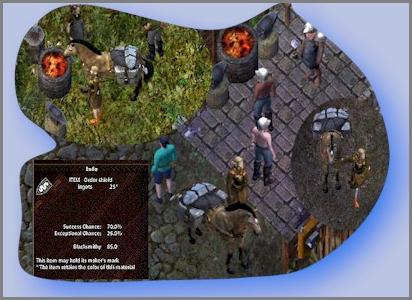
Clicking on the tongs will open the blacksmith menu. Click through
the lists to view the type of items you can make. At 40 skill you
need to craft something that will give you about 60% success rate or a
little higher. In the case of the smith, making daggers seems to get you
to the required 50 points fairly easily. As you craft them you can sell
them back to the smith so that you have some more money to buy more
ingots. If the gains slow down, select another item to craft with a
slightly lower success chance if making daggers is too easy. Keep making,
selling back and purchasing ingots until you get to the 50 required points
and collect your reward.
Tinkering: Completing this training is the same as for the smith
only you require tinker tools. Again select an item to craft that
will use the least resources for skill gains, key rings in the misc menu
seem to be ok to raise skill, but try a few things and see what you find
best. Again, sell back to the tinker for more gold to purchase more
ingots until you get the required skill and can claim the quest reward.
Quest Descriptions & Rewards
| Gain 50 points in: |
Quest Reward (blessed*) |
Item Properties |
Quest Giver |
| Tinkering |
Amelia's Toolbox |
500 Use Tinker Tools |
Amelia Youngstone the Tinkering Instructor |
| Blacksmithing |
Hammer of Hephaestus |
Uses 20, +10 Blacksmithing Skill |
George Hephaestus the Blacksmithing Instructor |
| Mining |
Jacob's Pickaxe |
Uses 20 +10 Mining Skill |
Jacob Waltz the Mining Instructor |
* blessed: a blessed item is one that does not require
insurance* to protect from loss. Any blessed item will remain on your
body if you die and will be in your backpack when you are resurrected.
Click the links below for Training Guides
Warrior/Fighter which covers the
Warrior, Paladin, Samurai and Ninja Classes
Spell-Caster which
covers the Mage and Necromancer Classes
Back
to Main Menu
|